Course manual: “Aim: Push the concept of marks as a tracery of movement to its logical conclusion by making marks incidental to your own movement.
Method: Find something which moves and attach a drawing medium to it so that it creates a drawing by itself. You might use a remote control car, a clock face, a door which is opened regularly, the foot of a dancer. Develop these automatic drawings using source material from your sketchbook or simply by responding to what you find as you experiment. Note carefully what happens when you shift the drawing from automatically produced marks to considered ones.”
LINE IN THE WIND
I am observing a bed sheet flapping on the clothesline in the wind, and decide to try a first “drawing machine” experiment there.

As the wind is quite strong, a charcoal stick or a pencil are too light- they would just fly around. I attach a stick to a string and dip the end in Indian ink. I attach a Canson A2 paper between two bricks.

I am really pleased with the variety of marks and shapes the stick is drawing.

The ink dries in the wind, so I have to dip the point in ink a few times.
This is the point where I decide that the drawing is finished:

I see a delicate flower and am really happy with this first drawing machine drawing.
For a second drawing, I add another stick, which I dip in W&N Vermellion ink, besides the first stick with Indian ink:

This is the result:

It is more chaotic than the drawing with only one stick, but I am pleased at the result. It has a clear center and the composition is held up by the accidental red dot on the left.
PLANT IN THE WIND
I decide to complicate the drawings further by attaching four thin markers- three black and one orange- to a small plant that is waving wildly in the wind.


I am really quite fascinated by the marks and patterns created. When the markers stop, as if reflecting where to swing next, they leave a stronger dot.

This is plant drawing number one:

It looks like a complicated constellation or map- I really like what came out of this.
I try this a second time, and add the stick dipped in ink for a short moment in the end- to create different values to the marks:

WASHING MACHINE
Our washing machine has a whole life of its own during the spinning cycle, so I decide to explore this as a drawing machine.
I suspend a row of coloured pencils and oil pastels, all in different blue shades, over the machine.


Although the machine has moved a good 20 cm forwards during the cycle, there are hardly any marks on the paper. The drawing materials are too light and make too faint a mark. I decide to repeat the experiment with coloured markers instead:

This time the result is more exciting:

As a drawing, I am less fascinated by it than by the more harmonious wind drawings both from the clothesline and from the little plant. The marks form less of a coherence here, but there are some interesting, almost cartoon figures within the lines.
THE BLENDER
Watching the blender shudder and swirl, I have another drawing tool.
Here I am using a thin paper roll from IKEA that can easily be bent and formed in the shape of the blender.
I first start by using some left overs of charcoal sticks that I simply throw in and start:

I am not sure what I was expecting, but the result is disappointing:

Next, I try some diluted Indian ink:

I place the paper on top of the bowl instead of inside, and use the pulse function, swirling the ink up to touch the paper.


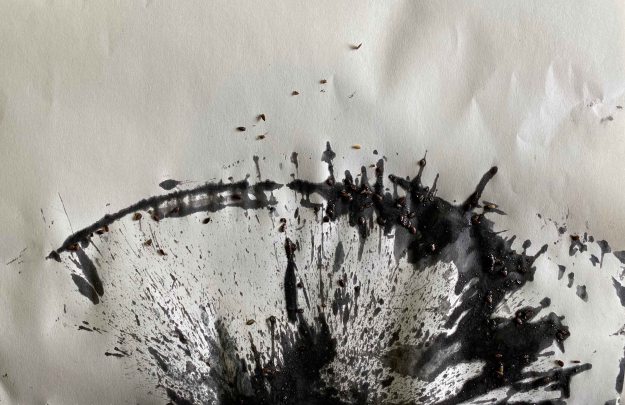
These two trials are more interesting than the charcoal one. I need something small and hard to swirl up with the motion and touch the paper though. I decide to add flaxseeds to my ink mixture.
This worked quite well- I like the explosive patterns:

As the paper is thin, it even comes with a texture .
One more attempt:

For a last experiment, I place the paper inside the blender:
This was a fun experiment, and reflects well the explosive force of the blender.
I am still mostly pleased with the four first ones created by the wind. They all have very delicate and intricate patterns with a variety of marks. I choose to continue working on these, seeing a pattern like flightlines over a map.
For the first one, I recreate a map under the lines using watercolour.
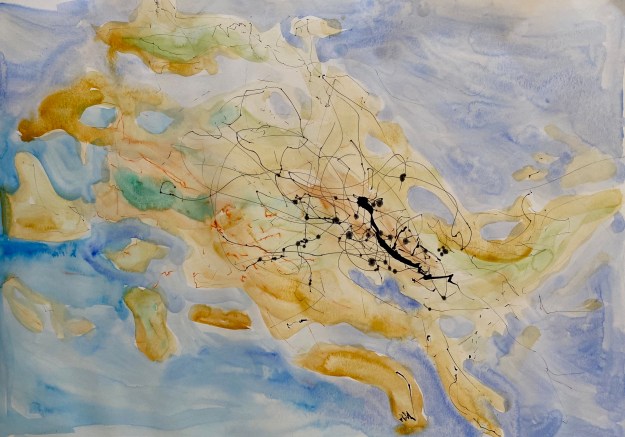
The result is too literal, to illustrative. For a next trial, I will only use Payne’s grey and black watercolours- aiming more for a schematic map.


I prefer this result, but I do still not think that the original drawing has improved.
For the last one where I recognize a delicate flower, I will only colour in the background to lift out the lines- again using Payne’s grey watercolour:

Unfortunately, I think all these drawings were more interesting before I started changing them. I liked the variety and “hesitation” of the marks, where they would suddenly change direction, something which I would not use if I was drawing consciously myself.
